Home Automation with Hive Active Plugs
Problem
I’ve had a little bee in my bonnet for the last few years with a “feature” on my clothes dryer. It’s an auto-sensing dryer that dries clothes to certain levels such as Ready to Iron, Ready to Wear and Extra Dry. Now, this is obviously a good thing since it only dries the clothes as is required rather than for a set time where the clothes might be damaged or that we’re wasting electricity. This is all well and good apart from the anti-crease feature of the dryer that causes it to beep with a stupid tune, really loudly, every 30 seconds…..FOREVER. Then every five minutes it would tumble for another 10 seconds or so to (supposedly) stop the clothes creasing.
Now, obviously the point here is that the incessant beeping is supposed to annoy you so you go and turn it off to stop wasting electricity and get your clothes out while they don’t look like a Shar-Pei, but there’s one oversight – you can’t put a load in the dryer on any of the auto-sensing modes before going to bed. If the dryer was inside the house, you’d be woken up by the incessant beeping every 30 seconds. In my case, the dryer is in the garage so it’s likely to wake the neighbours up if they have their windows open. Not great for neighbour relations.
I toyed with ideas like using a Raspberry Pi with a mic and writing some code to listen for and recognise when the stupid beeping started but writing software in node.js for a Fast Fourier Transforms just isn’t in my skillset.
Partial Solution
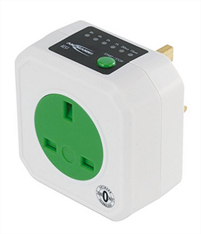
I initially bought a timer plug that would switch on and off but this was a poor option since it basically spent most of its time turned on. I decided to see if it was possible to find a countdown timer plug and, to my surprise they do exist but they only do preset times like 15 minutes, 30 minutes, 1 hour, 2 hours, 4 hours and 8 hours. You can’t set a specific time. Usually, a full load in the dryer takes just over an hour to get to Extra Dry so we would have to set the plug to 2 hours, meaning it would beep, every 30 seconds, for 40-50 minutes. I’ve lived with this solution for probably two years now.
Solution
About a year ago, I bought a Hive Heating system. I checked out Nest and Tado and other competitors but the Hive 2 looked (aesthetically) good, I didn’t need to have the Thermostat placed in a (mostly) fixed location and it ran on batteries to boot. If I’m spending the evening in the front room watching TV, it might as well be in the room with me, keeping the temperature in that room at the level I set. I’ve been VERY happy with the Hive solution and, as a bit of a tinkerer, knowing they had an API I actually started to develop a PowerShell 5 class that wrapped the API which I called PoSHive. PoSHive allows control over the heating system using simple typed commands. It has its limits – it doesn’t yet support hot water or multi-zone systems but those will come when I can have access to a Hive solution that controls Hot water and Multi-zone as well as the Heating. Anyway, I digress. Hive is awesome.

So, a few months back, Hive announced they were extending their smart heating and hot water system in to a fully-fledged Home Automation ecosystem by introducing sockets, window and door sensors as well as light bulbs – all smart so they can be controlled with an app…and quite likely, PoSHive after some more additions. Initially I didn’t buy a Hive Active Plug simply because I couldn’t think of a sensible use for it but then we had a mini heatwave in May 2017 that made me buy a fan and, being a lazy sod I decided to stick an Active Plug on the order as well so I could turn it on and off as desired.
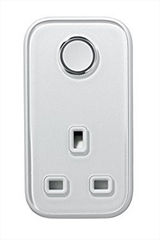
Once the plug arrived I tinkered with it a bit and worked out how the app communicated with the API so I could incorporate the HTTP calls in to PoSHive. As I was writing the methods and updating the class, I saw that the plug was reporting a powerConsumption property. I knew that my fan was a 30W fan and the values reported by the powerConsumption property looked very much like watts. A (smart) lightbulb came on.
Requirements
If the Active Plugs were reporting the power consumption through a property of the plug, that means I know when the device attached to the smart plug is consuming power. If I know when the dryer is consuming power to dry the clothes, I also know when it isn’t and therefore have a way of knowing that it is finished. I had written the code for PoSHive already, I just needed a script that would regularly monitor usage and let me know when it was done. I wrote the script using PowerShell and of course PosHive but needed a sensible way of triggering it. My fiancé isn’t about to turn on a computer and run a PowerShell script just to see when the dryer has finished and phoning me to do it equally wasn’t going to cut the mustard.
I started out looking at Azure Function Apps using PowerShell code which looked like a decent solution up until I saw they were only able to use PowerShell 4.0. Classes are only supported by PowerShell 5 so Azure Functions were a non-starter. One of the articles I read mentioned if you require PowerShell 5.0 to use Azure Automation.
I’d already used Azure Automation fairly successfully with PoSHive to do very simple things like telling me the temperature inside the house, but at the time I couldn’t really think of a use-case beyond proving PoSHive worked inside Azure Automation. Azure Automation is supposed to be run headless and is very much asynchronous – run the script and it could take anywhere up to 10 minutes to actually start so for synchronous calls and results Azure Automation wouldn’t work very well. If anything goes wrong you check the output on the portal. Given that the script just checks the plug regularly and then turns it off when it’s no longer in use, Azure Automation is perfect.
As I mentioned, I needed a way of triggering the script without logging on to Azure – if I had to do that, I might as well just run the script on my computer. I knew that Azure Automation also supported Webhooks, allowing me to use a simple HTTP POST to trigger the PowerShell Runbook on Azure without touching the portal
So, I have my solution:
- PoSHive Class – I publish this to the PowerShell Gallery to make installing easy for anybody on PowerShell 5+: Install-Module PoSHive
- Azure Account with an Azure Automation resource.
- Monitoring script written in PowerShell
- Hive Active Plug – obviously it must be attached to your system and working.
- Method of sending an HTTP POST – there are many.
Putting it all together
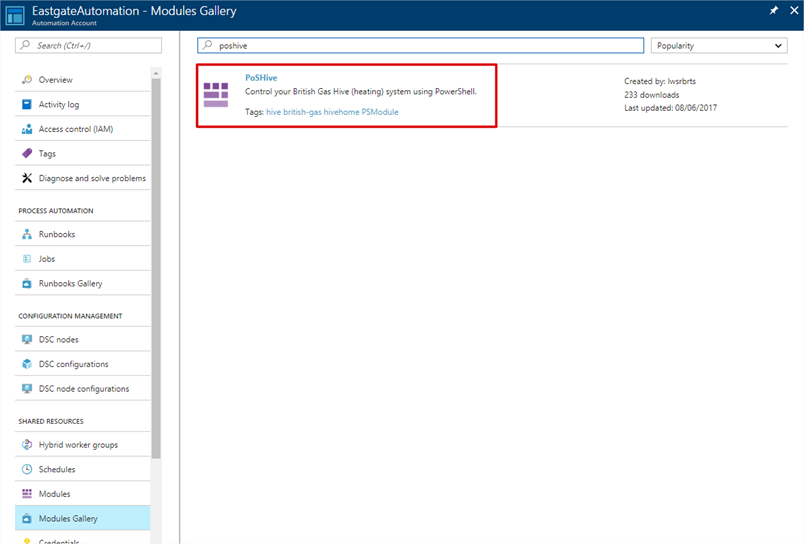
Firstly I installed the PoSHive class in to the Azure Automation account.
I create a Credential variable inside my Azure Automation account which holds my Hive username and passwords securely, rather than them being in the script. I also have a Sendgrid account on Azure that I’ll use to send an email within the script. Again, the credentials are stored in a Credential variable.

I add the PowerShell script as a runbook to the Azure Automation account and ensure it is published.

I then add a Webhook to the Runbook. It’s important to save the URL of the webhook since once you click OK, you’ll never see it again. This URL will be used to trigger the runbook instead of having to log on to Azure and click Run on the Runbook. Webhooks do expire after 1 year so be aware of that.
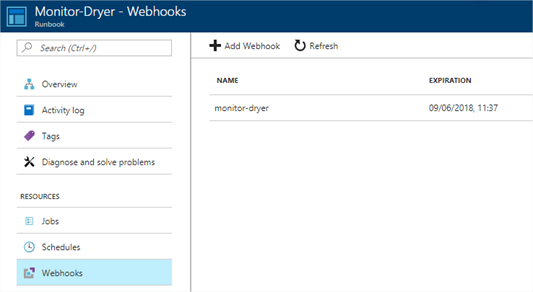
The script used for the Dryer-Monitor PowerShell Runbook is as follows:
|
1 2 3 4 5 6 7 8 9 10 11 12 13 14 15 16 17 18 19 20 21 22 23 24 25 26 27 28 29 30 31 32 33 34 35 36 37 38 39 40 41 42 43 44 45 46 47 48 49 50 51 52 53 54 |
Write-Output "$(Get-Date -Format "dd/MM/yyyy HH:mm"): Beginning..." Import-Module -Name PoSHive $Attempts = 2 # The number of consecutive times power consumption must fall below the Watts value to consider the device to be on "standby" or idling. $Watts = 100 # The value, in "watts" that the device must fall below to consider it to be in standby mode. $Triggered = 0 # The initial value of trigger counts. $PlugName = 'Dryer' # The name of the plug to monitor. $DelaySeconds = 120 # Must be lower than the API timeout value of ~ 10 minutes (600 seconds) $Triggered = 0 # Variables to use when sending email. $Sender = "<Dryer-Monitor@xxxxxxxxxx.com>" $Recipient = "xxxxxx<xxxxx@xxxxxxx.com>" $Subject = "Dryer has finished!" $Port = "25" $Server = "smtp.sendgrid.net" $SMTPCredentials = Get-AutomationPSCredential -Name 'Sendgrid' $Credentials = Get-AutomationPSCredential -Name 'Hive' $HiveUsername = $Credentials.UserName $HivePassword = $Credentials.GetNetworkCredential().Password $Hive = [Hive]::new($HiveUsername, $HivePassword) $Hive.Login() If ($Hive.GetActivePlugState($PlugName) -eq $false) { Write-Output "$(Get-Date -Format "dd/MM/yyyy HH:mm"): $PlugName is not currently turned on." $Hive.Logout() Write-Output "$(Get-Date -Format "dd/MM/yyyy HH:mm"): Complete." Break } Do { If (($PowerConsumption = $Hive.GetActivePlugPowerConsumption($PlugName)) -lt $Watts) { Write-Output "$(Get-Date -Format "dd/MM/yyyy HH:mm"): Power consumption ($PowerConsumption W) is below $Watts watts." $Triggered++ } Else { $Triggered = 0 Write-Output "$(Get-Date -Format "dd/MM/yyyy HH:mm"): Usage is $($PowerConsumption)W" } # Reset the trigger count. Previous results might have been temporary. Start-Sleep -Seconds $DelaySeconds } Until ($Triggered -ge $Attempts) $Hive.SetActivePlugState($false, $PlugName) $Hive.Logout() Send-MailMessage -From $Sender -Subject $Subject -To $Recipient -Body 'Dryer has finished' -Port $Port -SmtpServer $Server -Credential $SMTPCredentials -Priority High -ErrorAction Stop Write-Output "$(Get-Date -Format "dd/MM/yyyy HH:mm"): Complete." |
Triggering
The last piece of the puzzle is a simple method of triggering the monitor to activate. Yes, you can just do it from the Azure Portal but then there would be no need for the Webhook. Instead I decided to use an app on my Android phone called HTTP Shortcuts. It allows me to assign an HTTP action to a shortcut I can place on my Android home screen. A single press will send an HTTP POST to the Webhook, the Azure Automation Runbook will trigger and that’s it. Install the app, paste the URL in, change the method, click the tick then, if desired, create a shortcut on your Home screen.
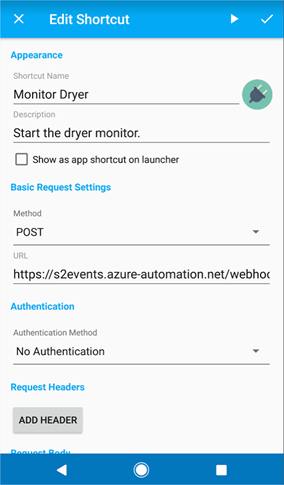
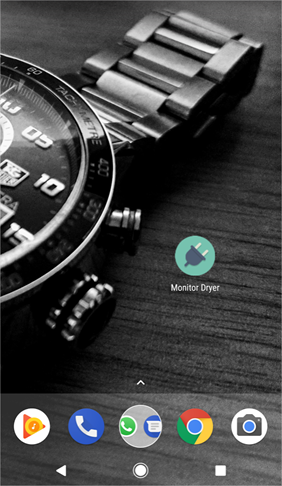
Now, because the method of triggering the Webhook is a simple HTTP POST, you can use a million ways of sending that request. A hacked Amazon Dash button, a Raspberry Pi with a physical button or even using IFTTT and Maker Webhooks. Infact, I have done that with Google Assistant and Maker Webhooks on IFTTT so I just have to say “OK Google, monitor the dryer.” and the POST request is sent, causing the Runbook to trigger. I don’t even have to lift a finger.
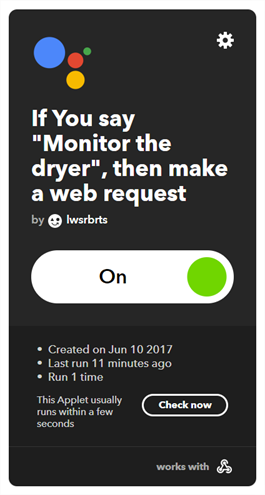
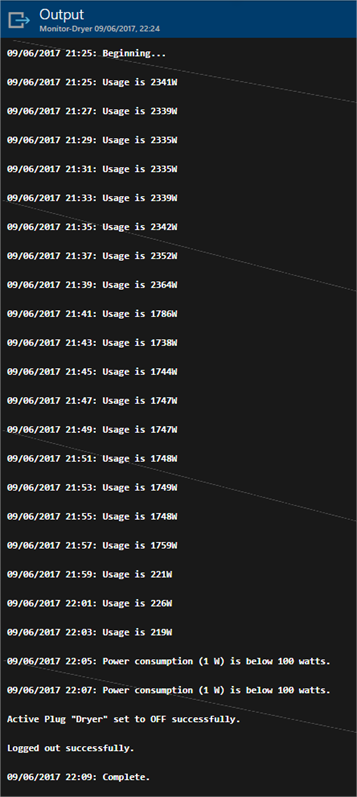
Once a load has gone in the dryer, I trigger the Webhook on my phone or using Google Home or Google Assistant and once the dryer has finished, the script turns the plug off to stop the beeping and sends me an email to say it is done. I’ve made my dumb tumbledryer as smart as anything else on the market today. Out of interest, here’s what the Output of the script looks like from Azure Automation – I can plot power consumption if I wanted.
-Lewis


