Configuring Azure Site-to-Site connectivity using VyOS Behind a NAT – Part 4
In the previous posts in this series we went through the process of creating a cross-premises Site-to-Site VPN with Azure by gathering some information about our local network, configuring the Azure Virtual Network and gateway and finally configuring VyOS so that the tunnel connected.

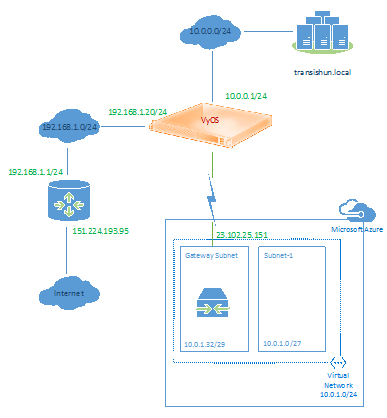
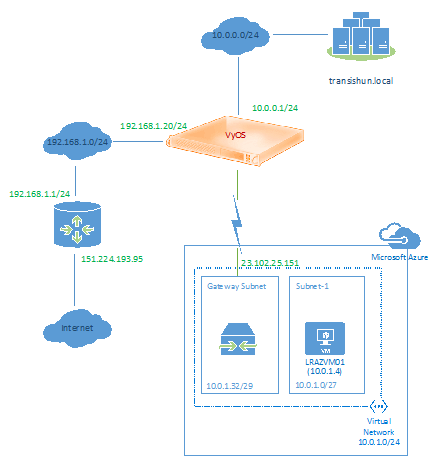
Now that the cross-premises tunnel is connected, in this post we’ll run through the process of creating a Virtual Machine in Azure which will reside in the Virtual Network we created in part 2. Before we start, our current network looks as follows (no VM in Azure).
Create the virtual machine
First, navigate to the portal and go to the Virtual Machines section and click Create a Virtual Machine.

In order to assign our new Virtual Machine to the AzureVNet virtual network we created, instead of clicking Quick Create, instead select From Gallery. Doing this gives us more options when creating the Virtual Machine that aren’t available through the Quick Create module.
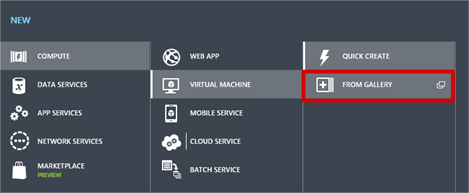
Select an appropriate image, and click the Next arrow.

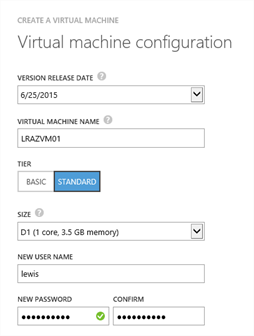
Choose your VM name, size and specify a user name for logging on to the machine. I’m using the name LRAZVM01 as was depicted in the end diagram in part 1 of this series. Click the Next arrow
On the next page, before doing anything else, click the Region/Affinity Group/Virtual Network drop-down and under Virtual Networks, you’ll see the AzureVNet that we created in part 2 of this series. Select that and a number of other drop-down menus will be shown. Arguably, this is all we have to do. Obviously you can customise anything else you require such as endpoints etc. before clicking the Next arrow.
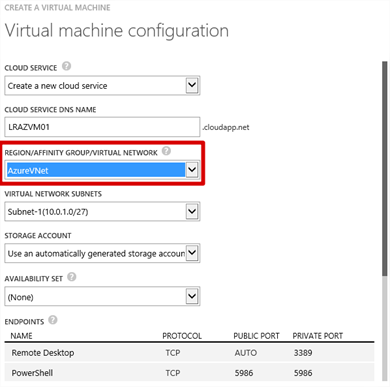
Hopefully, now that you’ve seen this, everything should drop in to place and what we completed in part 2 where we configured subnets inside our VNet should make a lot more sense. Obviously, if there were more than one subnet created, we could choose which one the VM would be created in by selecting the appropriate Virtual Network Subnet from the drop-down. I only have one since that’s all I created.

Proceed through the wizard, selecting anything you feel is necessary on the agent and security extensions page before completing to create the VM. In a short while, we should have a VM assigned to our VNet.

Connect to the VM
Once provisioned, the virtual machine should reside on an IP address within Subnet-1 of our AzureVNet Virtual Network. You can check this by navigating to the dashboard of the virtual machine (click it) and reviewing the quick glance information.
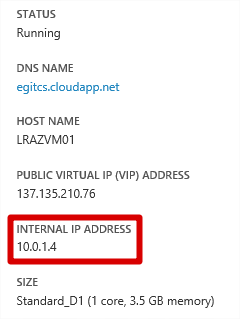
NB: Don’t worry about the DNS name, I’ve chosen to place my VM inside a pre-created Cloud Service.
Click the Connect button to RDP to the new VM. Open the RDP file and enter the credentials you specified when you created the Virtual Machine.

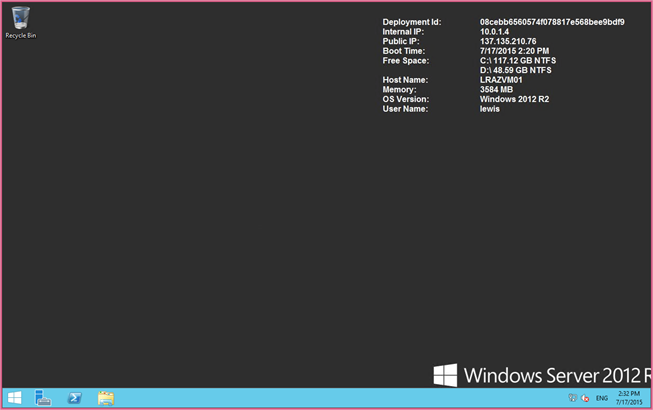
Once connected and logged on, we get to the desktop of the VM. At this time, we’re RDP’d to the Azure VM via its public IP address. Open up a command prompt.
Prove connectivity using ICMP (ping)
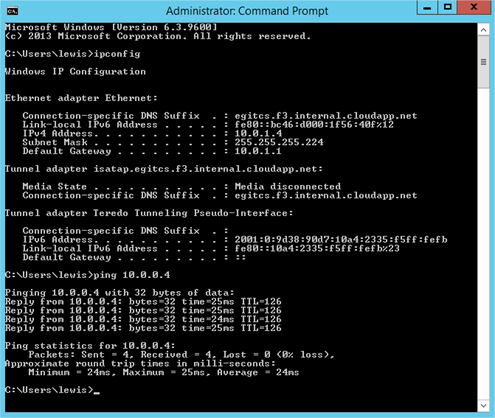
From the command prompt on our Azure VM (LRAZVM01 – 10.0.1.4) attempting to ping our on-premises Domain Controller (LR02DC02.transishun.local – 10.0.0.4) results in success. Fantastic.
Repeating the ping in the other direction (as shown in the screenshot below) doesn’t work though. Why? This is simply because Windows Firewall on the Azure VM is blocking ICMPv4 echo requests. The reason it works to the Domain Controller is because there’s a firewall rule created to permit ICMPv4 echo requests for Domain Services.
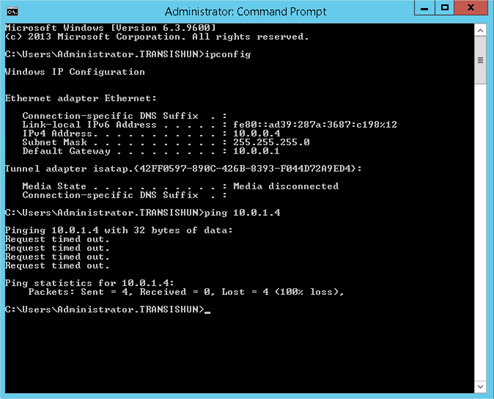
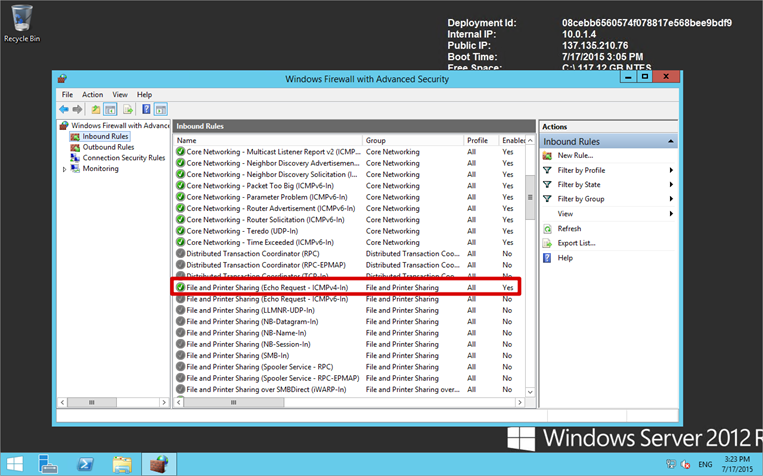
For the sake of completeness, you can enable ICMPv4 echo requests on LRAZVM01 by enabling the File and Printer Sharing (Echo Requests – ICMPv4-In) rule in Windows Firewall with Advanced Security as shown below. There are of course a million ways to achieve this – this is only one.
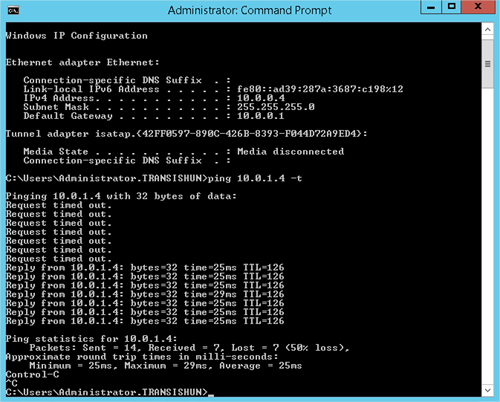
Now pinging the Azure VM (LRAZVM01 – 10.0.1.4) from our Domain Controller (LR02DC02.transishun.local – 10.0.0.4) should work as expected. In the screenshot below, I start a ping before enabling the firewall rule then, after enabling the firewall rule, we start to receive responses.
We’ve now proven communication between our on-premises network and a private network in the Azure cloud through a Site-to-Site VPN.
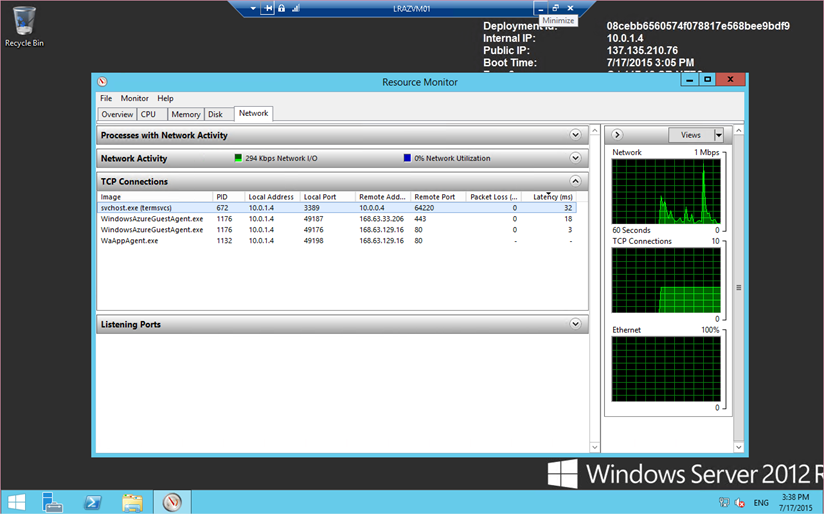
Now I’m able to deploy Azure VMs as required, join them to my domain and offload compute workloads as required. In case you’re wondering, yes, it is possible to RDP to the Azure VM from any workstation in my 10.0.0.0/24 subnet without going over the Internet.
What Next?
Well, that’s up to you. When your network is extended using a Site-to-Site VPN, your throughput up and down is defined by the limits of your Internet connection. If that’s 2Mbps up and down with shocking latency, it’ll be very much the same when you’re communicating with Azure, so consider this before extending cross-premises.
If you intend to deploy longstanding compute workloads in to Azure then it makes sense to create a couple of Domain Controllers in an Availability Set in the Azure virtual network. Deploying Domain Controllers requires the use of static IP addresses and so there’s a couple of Azure PowerShell commands you need to throw at your intended Domain Controllers so that they retain a static internal IP address.
The following article on the Azure website describes the process, including assigning static internal IP addresses, creating a new Active Directory Site to represent the Azure Virtual Network, reconfiguring the DNS servers for the Azure Virtual Network (no point sending DNS requests over the Site-to-Site VPN!) and adding separate disks to the Domain Controller VMs for the AD database, logs and SYSVOL.
I hope this series has been useful for you – as ever, if you have any questions, please let me know in the comments. One final screenshot proves we have a VM residing in the AzureVNet and is happily transmitting data across the Site-to-Site VPN.
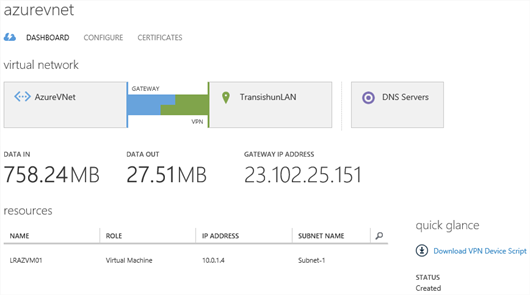
Our completed network.
-Lewis


