Configuring Azure Site-to-Site connectivity using VyOS Behind a NAT – Part 2
If you haven’t read part 1 of this series, please review that before proceeding here. In part 1, I describe the network that we are starting with (mine) and how it is configured to enable routing across a virtual software router called VyOS between a home lab (a Windows domain called transishun.local) hosted in VMware ESXi 5.5 and my main “everyone’s phones are on it” network – I’ll call this the DMZ from here on. I also mention that my primary “edge” router is an off-the-shelf type on which I have installed DD-WRT which adds capabilities that permits it to perform source NAT for more than just the primary network, thereby avoiding double-NAT (bleugh!). If that’s something you’re interested in doing for yourself, it’s educational and I’m always here to answer questions should you feel the need.
As a reminder, here’s the current network before we do anything in Azure.

Prepare the edge router
So, I said that in part one of this series that I would be focusing on Azure. While that’s mainly true, we first need to configure the edge router to permit IKEv1 and IPsec traffic to flow between the Azure Virtual Network Gateway and the VyOS software router. We also need to find out what our external IP address is.
On the edge router, I navigate to the port forwarding section and enter the following information. Setting up a port forward allows the VPN tunnel setup and security handshake data packets to traverse the edge router and be received by VyOS. NB: The destination IP address is the DMZ side NIC of the VyOS router.
- Protocol: UDP
- Source Port: 500, 4500
- Destination IP: 192.168.1.20 (the VyOS software router!)
- Destination Port: 500, 4500

Once the configuration is saved, we have something akin to the following, where the green line is the NAT rule for IKEv1 and the orange line is the NAT for IPSEC.
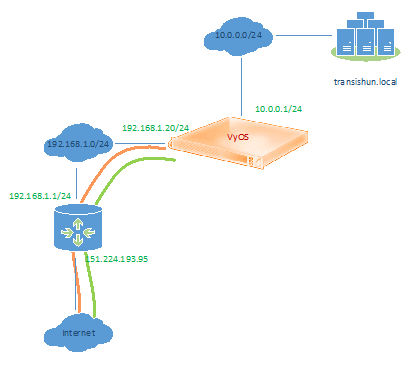
We also need the external IP address of our Internet connection. We need this when we configure the Virtual Network Gateway in Azure, so that Azure knows who to talk to. This is easily found by asking Google “What is my IP?” – Yes, this is my current (as of this post’s date) external IP address – it doesn’t take a rocket scientist to work it out, even if I had masked it somehow.

To Azure!
Finally, we’re here. I can’t talk you through the process of signing up, setting up subscriptions etc. as I have to assume you already have a subscription if you’re reading this. I am using the current (as of this post’s date) portal. While I’m certain these features are also available in the preview portal, I felt it best to demonstrate the current portal.
Once you’ve logged in to the portal, navigate to the Networks option. Here you’ll see that, most likely, you have no virtual networks. If you click the Local Networks and DNS Servers tabs, you’ll see something very similar – none configured. Now click the New button at the bottom left.
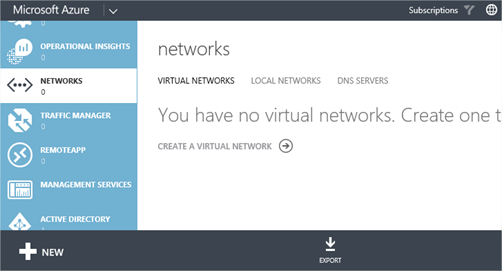
Select Network Services > Virtual Network > Custom Create

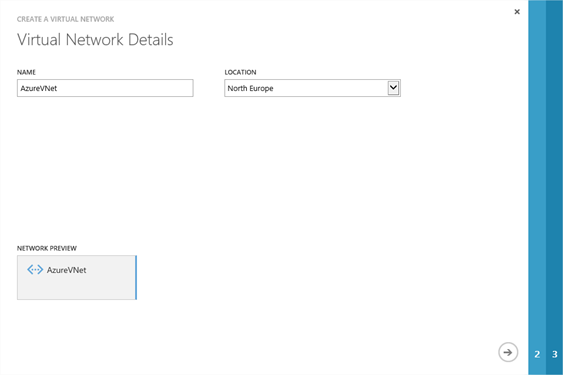
In the Create Virtual Network wizard, enter a descriptive name for the Azure side Virtual Network and select a datacentre location – I’ve selected North Europe as it’s physically closest to me. NB: The location will also be the datacentre where any VMs you deploy in to this Virtual Network will be created. Click the Next arrow.
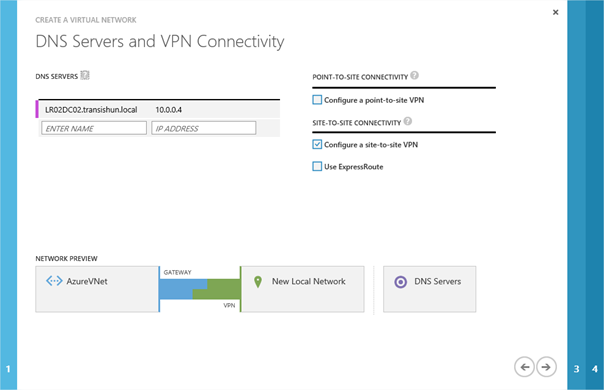
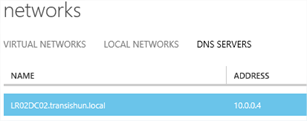
On the DNS Servers and VPN Connectivity page, specify the name and IP address of the on-premises DNS servers. Typically this is most likely to be Domain Controllers that are running the DNS role. My domain controller is LR02DC02.transishun.local (10.0.0.4) so I add that – I only have the one, it’s a lab 🙂 but you should specify more, for obvious reasons. Specifying the FQDN isn’t necessary but it helps you identify it later. Also, select the check-box next to Configure a site-to-site VPN. Your screen should look similar to the following. Click the Next arrow.
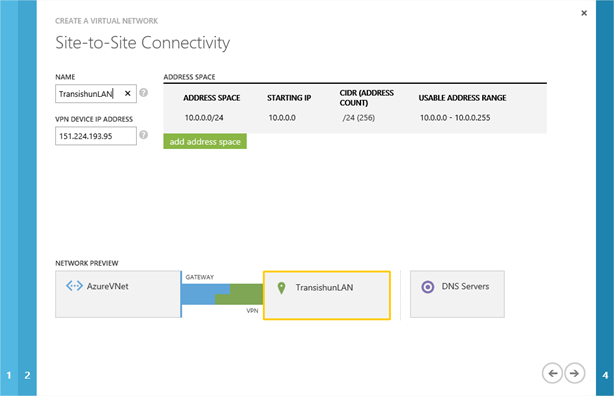
On the Site-to-Site Connectivity page, you specify the information for your on-premises subnets. Since I only have the one (10.0.0.0/24) with which I want to communicate from Azure, I enter that. Additionally, I’m asked for the VPN device IP address. Here we provide the external IP address of our edge router that we obtained from Google earlier on. Click the Next arrow.
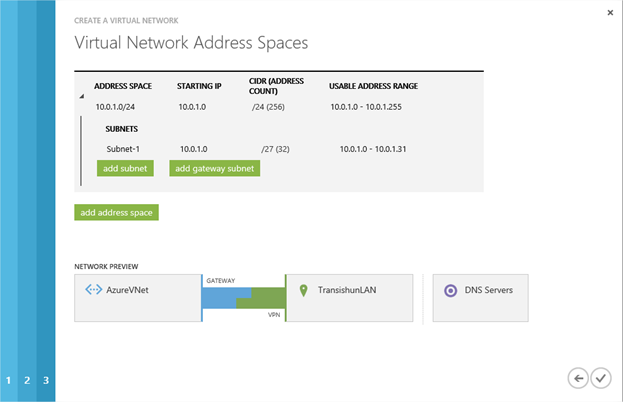
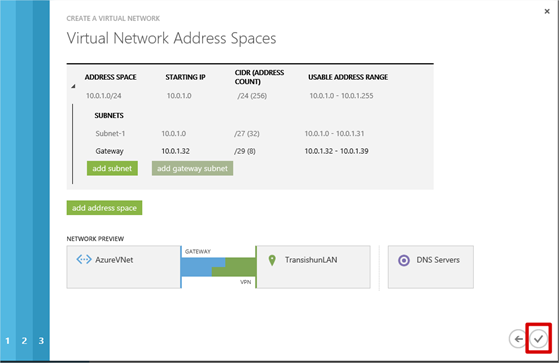
On the Virtual Network Address Spaces page, you specify the subnet to be assigned to the Azure Virtual Network – this will be the subnet in Azure where the VMs (and other subnets) will reside and that will become the extension of your network.
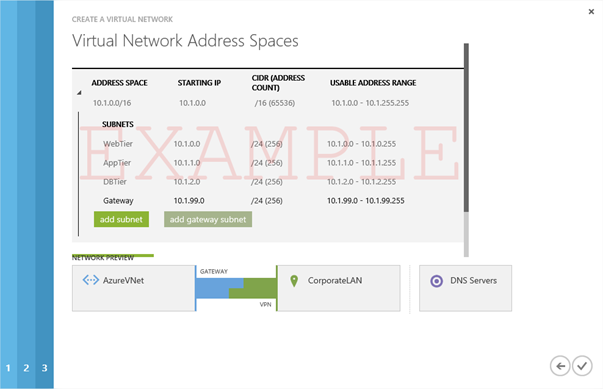
NB: In many cases, you will need to consider this decision carefully to ensure that the subnets you specify do not overlap with your existing on-premises subnets for routing purposes and so that it will give you sufficient usable IP address capacity for your Azure VMs. Microsoft suggest assigning the VNet a /16 since it will be further subnetted in order to add a gateway subnet for VPN routing purposes. I show an example of this kind of configuration in a moment.
Since my own domain network mask is a /24 and the workloads that I will be running on Azure are going to be small numbers of machines, I only need another /24 – in this case, the wizard has automatically selected 10.0.1.0/24 as the suggested Virtual Network address space and it has added Subnet-1 (10.0.1.0) and given that a mask of /27, meaning I can squeeze about 28 Azure VMs in to that subnet. That’s plenty for my purposes and I won’t need to change or extend Subnet-1 any further in to the 10.0.1.0/24 network.
NB: Notice I haven’t made any changes to this page yet, I wanted you to see what Azure’s suggested configuration looks like before we tinker with the configuration, so don’t click Next yet.
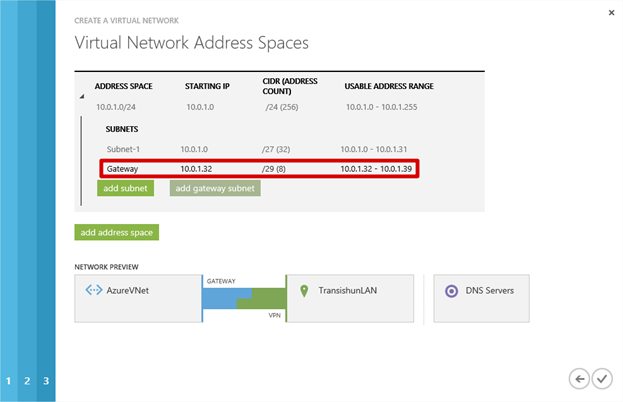
Before I continue, the Virtual Address Space needs a gateway subnet so I’ll click the add gateway subnet button to add one. Remember, there’s nothing stopping you from reconfiguring the subnets before adding the gateway network. My own personal requirements are very limited so I’m showing you my configuration first.
Here’s an example of what you could do for a larger enterprise network that expects to extend their infrastructure very heavily in to the cloud and will use subnets and Network Security Groups to segregate application tiers. I am not using this, it’s here for illustration of what a corporate implementation might look like.
Now that the configuration of the VNet address spaces is complete, I click Complete to create the Virtual Network.
Once the virtual network is configured, it will be shown in the portal and there will also be entries under the Local Network and DNS Servers tabs as well.


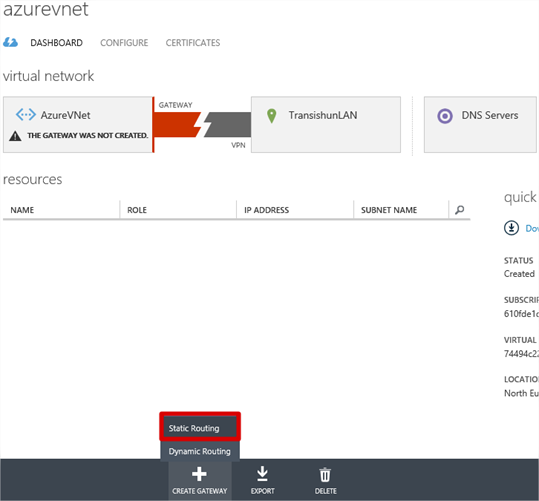
Now I need to create the Virtual Network Gateway. On the Virtual Networks tab, click the virtual network that was created to show the dashboard for the virtual network. When you open the dashboard, you see a graphic depicting that there is no connectivity between the Azure Virtual Network and the on-premises network. The Azure Virtual Network also shows a warning message THE GATEWAY WAS NOT CREATED. At the bottom of the page, click the Create Gateway + button and then select Static Routing.
You are asked to confirm the creation of the gateway and the process begins. The Virtual Network Gateway is an external IP address, with which the VyOS router can connect, to form the Site-to-Site VPN tunnel. This can take some time to complete – up to 20 minutes – so it might be worth making a cup of tea.

Once complete, the dashboard changes to show metrics on data transferred and provides a gateway IP address. Make a note of the gateway IP address.

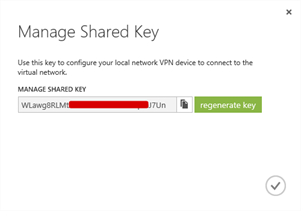
In order to configure VyOS, we need a shared secret, this is basically a password that each end of the tunnel knows and uses during negotiation. To get the password, click the Manage Key button at the bottom of the page.
Record the shared key, it will be required in part 3 of this series when we configure VyOS and connect up the tunnel.
We have completed the configuration in the Azure Portal for now and so, armed with the Gateway IP address and Shared Key, we can configure the VyOS software router to form up the tunnel and complete the configuration in part 3 of the series. Until then…


